-
Camera Type
Mirrorless
-
Corresponding Mount
L-Mount, Sony E-mount
-
Sensor Format
Full-frame [DG]
-
Lens Construction
11 groups, 13 elements (1 FLD, 1 SLD and 3 aspherical lens elements)
-
Angle of View
94.5°
-
Number of Diaphragm Blades
9 (rounded diaphragm)
-
Minimum Aperture
F22
-
Minimum Focusing Distance
22cm / 8.7in.
-
Maximum Magnification Ratio
1:6.7
-
Filter Size
φ62mm
-
Dimensions (Diameter × Length)
L-Mount:φ70mm × 72.4mm / φ 2.8in. x 2.9in.
Sony E-mount:φ70mm × 74.4mm / φ 2.8in. x 2.9in.
-
Weight
L-Mount:370g / 13.1oz.
Sony E-mount:370g / 13.1oz.
-
Edition Number
C022
The three-digit code on the surface of the lens is to indicate the year the lens was first released.
(Since it is different from the year of manufacture, the release year and edition number may not match depending on the mount.) -
Supplied Accessories
・Magnetic metal lens cap LCF62-01M
・LENS HOOD LH656-03
・FRONT CAP LCF-62mm III
・REAR CAP LCR II -
Mount / Product Barcode
L-Mount:00-85126-49069-0
Sony E-mount:00-85126-49065-2
-
Camera Compatibility
LINK
-
* L-Mount is a registered trademark of Leica Camera AG.
* This product is developed, manufactured and sold based on the specifications of E-mount which was disclosed by Sony Corporation under the license agreement with Sony Corporation.
-
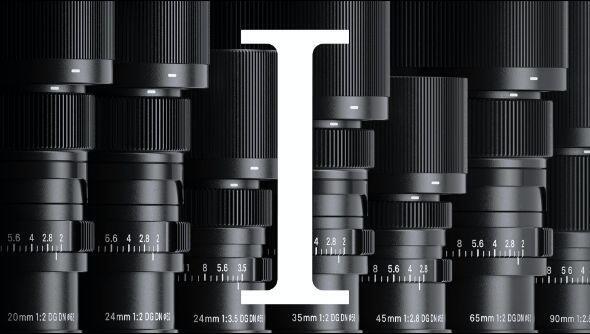
I series “Premium Compact Primes” for mirrorless users
The Sigma I series features full-frame compatible lenses that offer new value to mirrorless systems. The combination of superb optical performance with a level of compactness that is perfectly suited to smaller and lighter modern mirrorless cameras will bring you new opportunities for a perfect shot.
Sigma is aware that in today’s world we have a wide range of camera choices, especially with the increase in mobile phone ownership. But with many photographers looking for something more than something that simply captures images when they choose to own a camera and lens, I series lenses offer the ultimate combination of superb optical performance, outstanding usability and compact form-factor.
Sigma’s excellence in development and production technologies has been built up since our founding in 1961 and became increasingly sophisticated with the introduction of the Sigma Global Vision brand in 2012. With this as a base, Sigma has given careful thought to the quality of the products, the feeling of using it and the pleasure of owning it. This is how the I series was born. -
20mm, 24mm, 35mm ,50mm and 65mm five lenses with F2 brightness in the lineup
-
New standards of optical performance for the Contemporary line
The 20mm F2 DG DN | Contemporary achieves the highest level of optical performance even at the widest aperture setting of F2 from the center of the image to the periphery. Based on the latest optical design technology, the lens construction includes three high-precision glass-molded aspherical lens elements, one SLD element, and one FLD element to suppress a range of optical aberrations. The result is clear and sharp images even in the extreme corners of the frame. By focusing on the suppression of sagittal coma flare, which is difficult to correct in post-processing, accurate reproduction of very bright points of light has been achieved. This also provides extremely detailed results across the entire image, which is especially important for night sky photography.
The lens’ optical design, as well as its Super Multi-Layer Coating and Nano Porous Coating (NPC), ensures very minimal flare and ghosting even when shooting into bright light sources. This makes it much easier to photograph backlit subjects and still achieve punchy, high contrast results.
-
Use of multiple high-precision aspherical glass molded lenses
The surface of molds for glass molding, which is a process that forms optical components by pressing glass materials at high temperatures, requires ultra-high precision. Sigma uses high-precision molds whose surfaces are controlled with an accuracy of ±5 nanometers (0.000005 mm) or smaller. High precision aspherical glass molded lenses archives both good aberration correction and compact lens size.

Mold for aspherical glass molded lenses
-
Sigma’s unique coating technology Nano Porous Coating
The super multi-layer coating is combined with Sigma’s unique coating technology “NPC (Nano Porous Coating)”. The lens has been designed to be less susceptible to strong incident light such as backlight.
“NPC (Nano Porous Coating)” incorporates porous silica as the coating material. The porous silica layer has nano-sized holes with air inside. Having holes of this size enables a large reduction in the refractive index, allowing the reflectance to be lowered more than conventional anti-reflective coatings. As a result, reflected light causing flares and ghosting is sharply reduced, achieving clear image quality.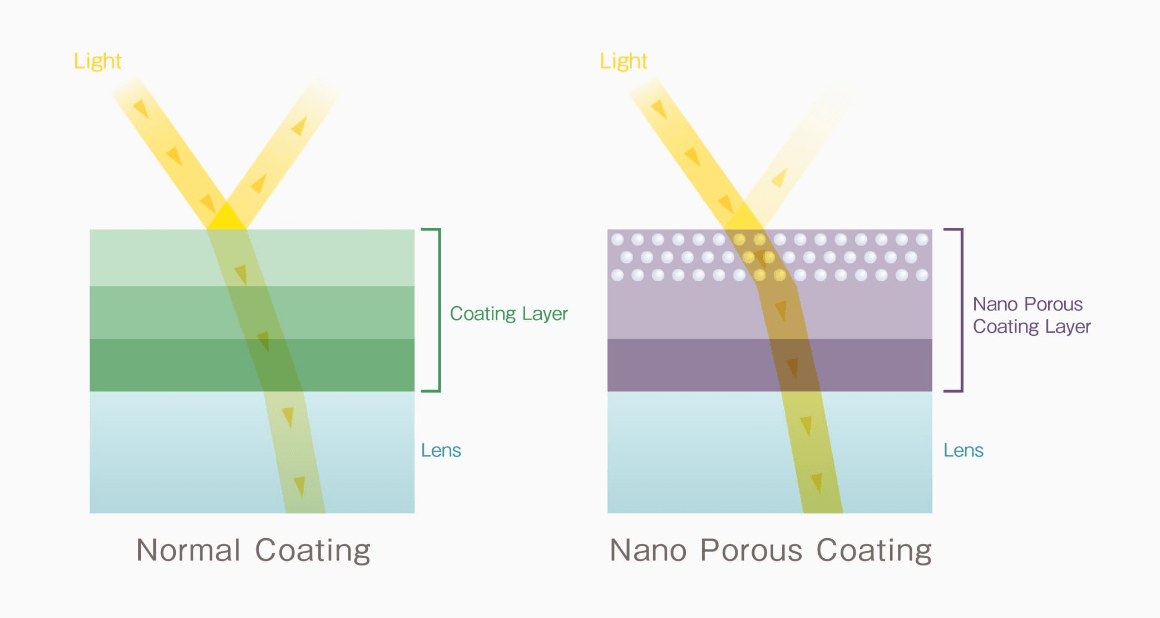
-
Exceptional I series build quality with a compact form-factor
All I series lenses have an all-metal construction. The precision-cut aluminum parts not only give the barrel a sleek, stylish finish, but provide superb durability that improves the quality of the entire product. Metal materials are also used in internal structures that slide with the operation ring for added robustness. These high-precision components crafted with Sigma’s cutting-edge metalworking technology are also used in Sigma’s CINE LENS line-up for professional cinematographers and provide a tactile, ergonomic feel that make the lens a pleasure to use.
The cover ring between the focus ring and the aperture ring has hairline processing that is also used for the rear cylinder of the Art line. This covering functions as a finger hold when attaching or detaching the lens.
-
Magnetic metal lens cap
I series lenses are accompanied by a dedicated magnetic metal lens cap*, in addition to a normal plastic cap. This dedicated metal cap clips to the front surface of the lens magnetically. It is no exaggeration to say that this meticulously crafted cap represents the finishing touch for the I series.
*Except Sigma 45mm F2.8 DG DN | Contemporary

Sigma I series | Magnetic Metal lens Cap Promotion Video
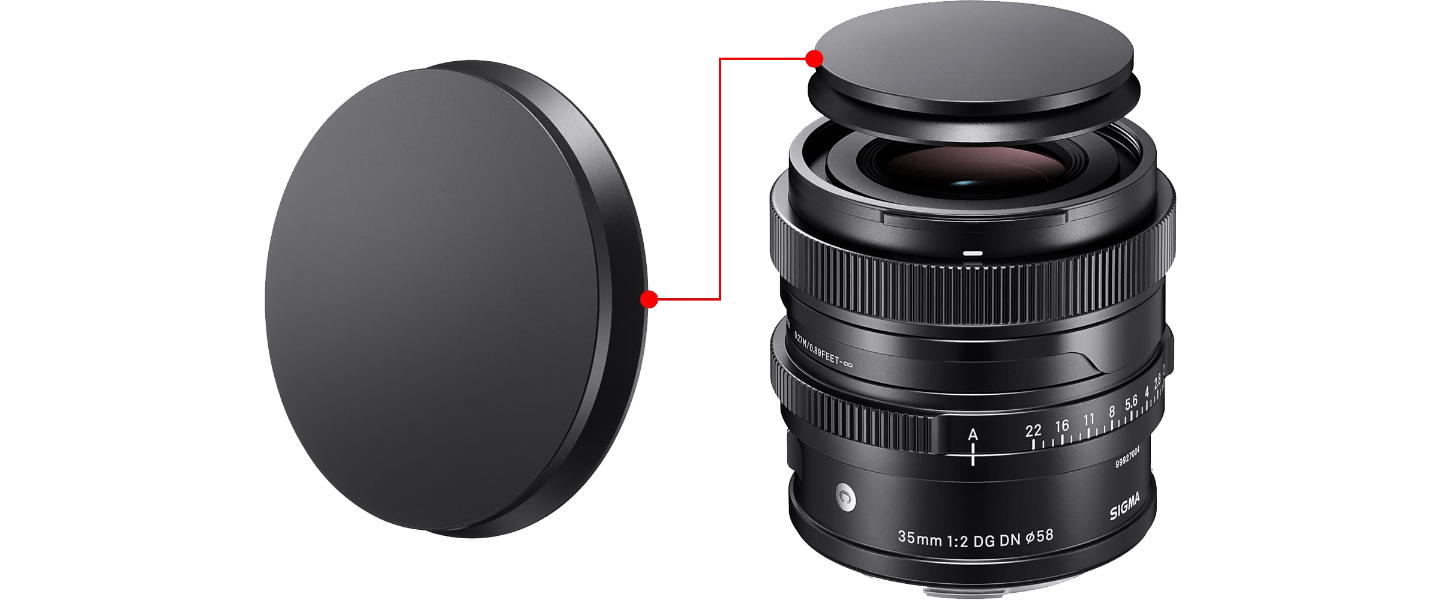
※ The image is 35mm
※ Cannot be used when a filter is attached. -
Magnetic metal lens cap holder LENS CAP HOLDER CH-11 (sold separately)
When a cap is removed from the lens it should have a proper place where it can be kept. Using this as a starting point, a cap holder using the magnetic force of the dedicated cap was created.
With the cap attached to the ring plate, and the plate clipped to a bag or belt, the cap is always within easy reach and is less likely to get lost. Plus, its elegant design is a stylish addition to a photographer’s equipment.

Lens construction
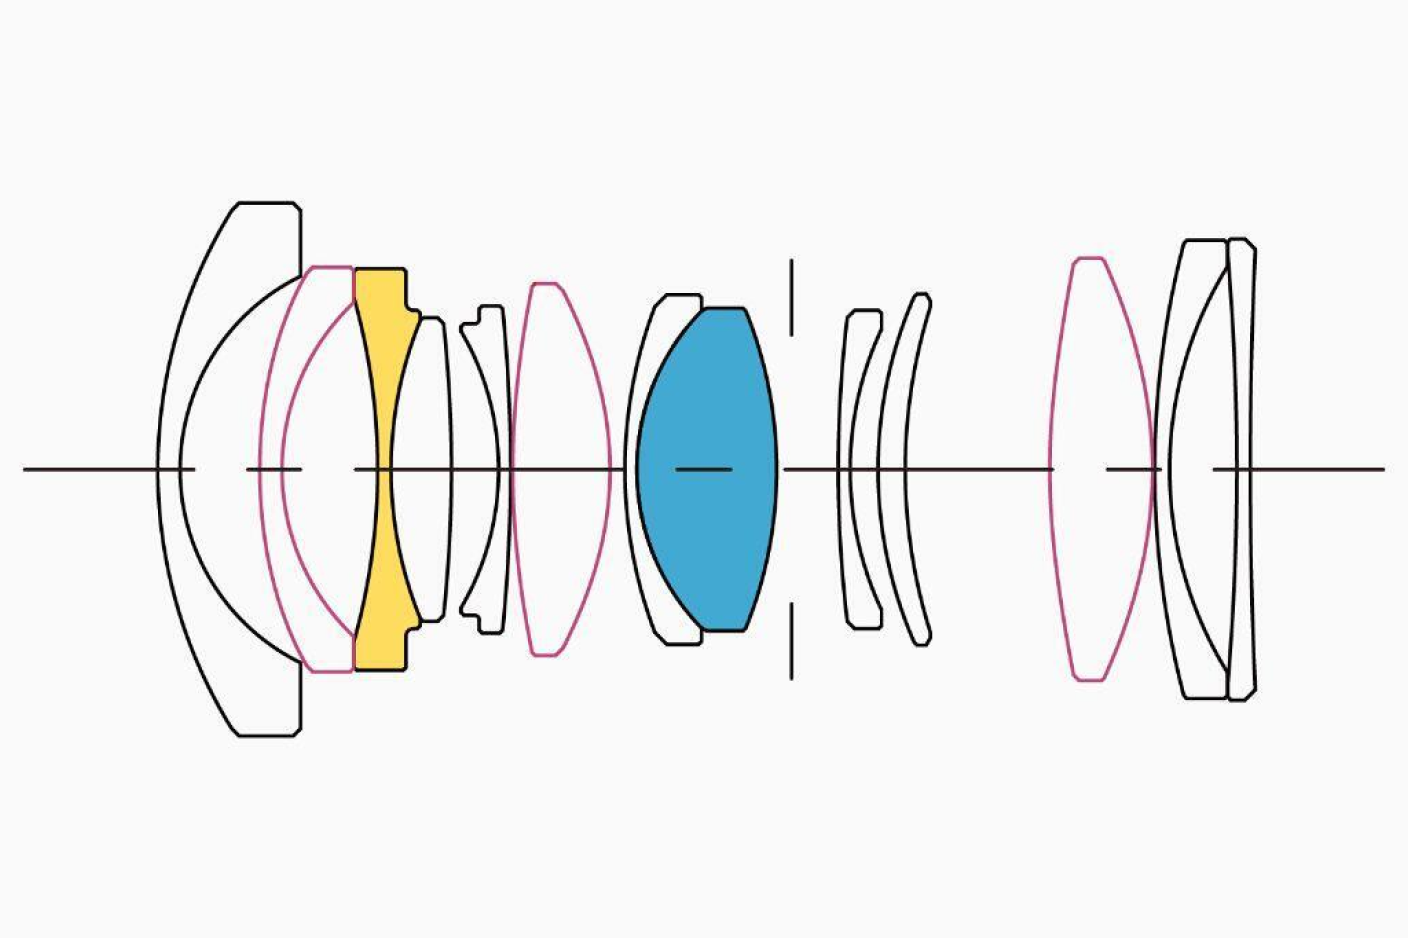
FLD glass
SLD glass
Aspherical lens
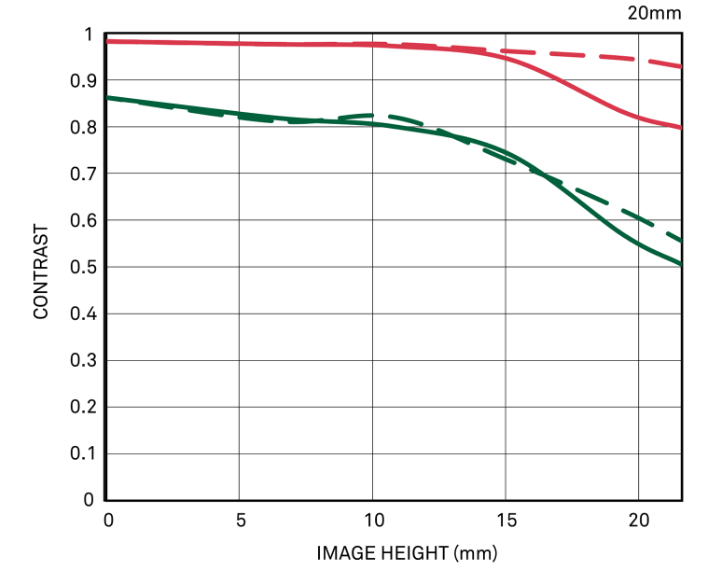
MTF Chart
The MTF (Modulation Transfer Function) is one of the measurements for evaluating a lens’ performance, and it shows how faithfully the contrast of the subject can be reproduced on the image plane. The horizontal axis shows the image height (distance from the center of the image in mm) and the vertical axis shows the contrast value (maximum value is 1).
The closer the 10 line pairs/mm curve is to 1, the higher the contrast and clarity of the lens is, and similarly, the closer the 30 line pairs/mm curve is to 1, the better the resolution and sharpness of the lens is.
*The MTF chart depicts the result at the wide-open aperture.
*For mirrorless lenses that support distortion correction, the horizontal axis shows the image height equivalent to when an L-Mount lens is attached to a Sigma L-Mount camera with distortion correction applied. (The effect of distortion correction may differ depending on the mount and camera used.)
*The spatial frequency indicates the variation on the image plane before distortion correction is performed.
-
Spatial frequency
S:Sagittal Line
M:Meridional Line
-
10lp/mm
-
30lp/mm
Diffraction MTF
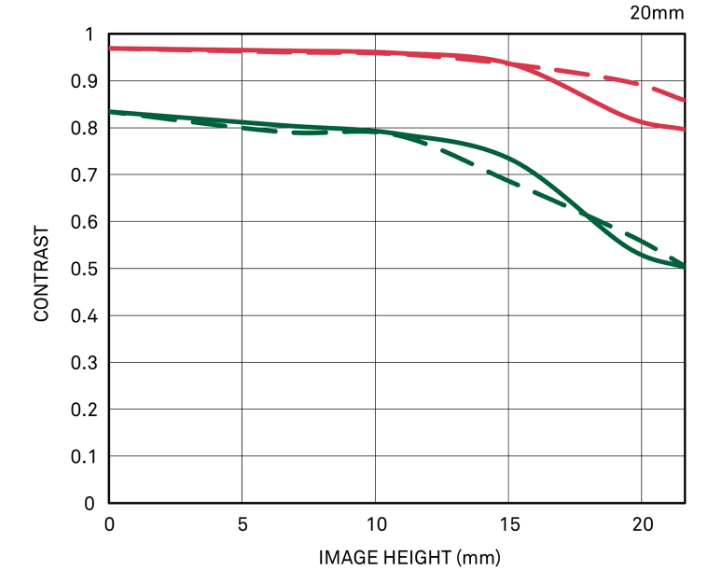
Geometrical MTF
-
Lens construction: 13 elements in 11 groups, with 1 FLD, 1 SLD and 3 aspherical lens elements
-
Compatible with high-speed autofocus
-
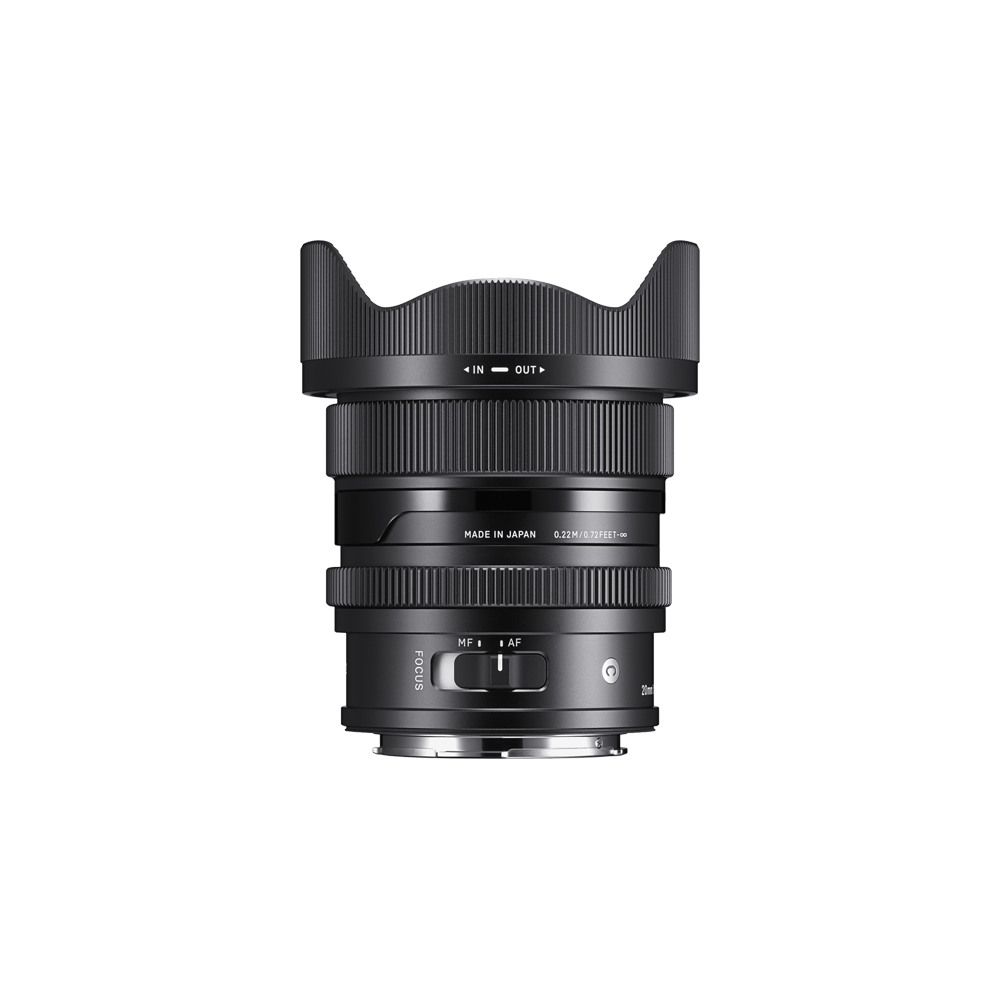
Support DMF and AF+MF
-
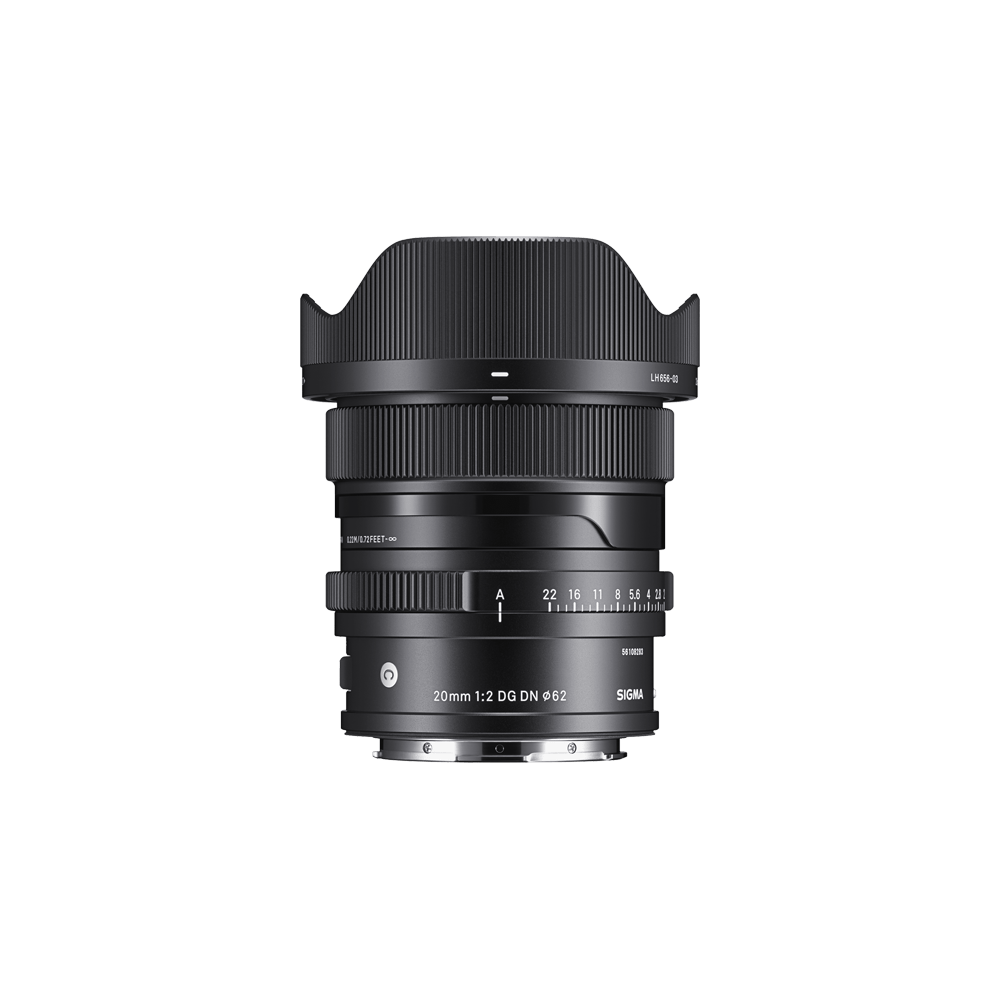
Petal-type lens hood(LH656-03)
-
Magnetic metal lens cap(LCF62-01M)
-
Compatible with Sigma USB DOCK UD-11 (sold separately / for L-Mount only)
-
Designed to minimize flare and ghosting
-
Every single lens undergoes Sigma’s proprietary MTF measuring system
-
9-blade rounded diaphragm
-
High-precision, durable brass bayonet mount

| Camera | α7R IV |
|---|---|
| Shutter Speed | 1/200s |
| Lens F Number | F2 |
| ISO | 1600 |
| Focal Length | 20mm |
| Photographer | Adam Klingeteg |

| Camera | α7R IV |
|---|---|
| Shutter Speed | 1/20s |
| Lens F Number | F2 |
| ISO | 1600 |
| Focal Length | 20mm |
| Photographer | Adam Klingeteg |

| Camera | α7R IV |
|---|---|
| Shutter Speed | 1/500s |
| Lens F Number | F5 |
| ISO | 500 |
| Focal Length | 20mm |
| Photographer | Adam Klingeteg |

| Camera | SIGMA fp L |
|---|---|
| Shutter Speed | 1/200s |
| Lens F Number | F4 |
| ISO | 100 |
| Focal Length | 20mm |
| Photographer | Aya Iwasaki |

| Camera | SIGMA fp L |
|---|---|
| Shutter Speed | 3.2s |
| Lens F Number | F2 |
| ISO | 200 |
| Focal Length | 20mm |
| Photographer | Aya Iwasaki |

| Camera | SONY α7S III |
|---|---|
| Shutter Speed | 10s |
| Lens F Number | F2 |
| ISO | 1600 |
| Focal Length | 20mm |
| Photographer | Jack Fusco |

| Camera | SIGMA fp L |
|---|---|
| Shutter Speed | 1/60s |
| Lens F Number | F2 |
| ISO | 1600 |
| Focal Length | 20mm |
| Photographer | Jim Koepnick |

| Camera | SIGMA fp L |
|---|---|
| Shutter Speed | 1/60s |
| Lens F Number | F3.5 |
| ISO | 160 |
| Focal Length | 20mm |
| Photographer | Jim Koepnick |

| Camera | SIGMA fp L |
|---|---|
| Shutter Speed | 1/100s |
| Lens F Number | F3.2 |
| ISO | 800 |
| Focal Length | 20mm |
| Photographer | Jim Koepnick |

| Camera | SIGMA fp L |
|---|---|
| Shutter Speed | 1/2s |
| Lens F Number | F10 |
| ISO | 800 |
| Focal Length | 20mm |
| Photographer | Kim Jenssen |

| Camera | SIGMA fp L |
|---|---|
| Shutter Speed | 1/1600s |
| Lens F Number | F2 |
| ISO | 200 |
| Focal Length | 20mm |
| Photographer | Shinichi Hanawa |

| Camera | SIGMA fp L |
|---|---|
| Shutter Speed | 1/1250s |
| Lens F Number | F2 |
| ISO | 400 |
| Focal Length | 20mm |
| Photographer | Shinichi Hanawa |

| Camera | SIGMA fp L |
|---|---|
| Shutter Speed | 1/1000s |
| Lens F Number | F5.6 |
| ISO | 100 |
| Focal Length | 20mm |
| Photographer | Shinichi Hanawa |

| Camera | SIGMA fp L |
|---|---|
| Shutter Speed | 1/100s |
| Lens F Number | F5.6 |
| ISO | 400 |
| Focal Length | 20mm |
| Photographer | Aya Iwasaki |

| Camera | SONY α7S III |
|---|---|
| Shutter Speed | 10s |
| Lens F Number | F2 |
| ISO | 1600 |
| Focal Length | 20mm |
| Photographer | Jack Fusco |

| Camera | SONY α7S III |
|---|---|
| Shutter Speed | 15s |
| Lens F Number | F2 |
| ISO | 1600 |
| Focal Length | 20mm |
| Photographer | Jack Fusco |

| Camera | SIGMA fp L |
|---|---|
| Shutter Speed | 1/200s |
| Lens F Number | F13 |
| ISO | 400 |
| Focal Length | 20mm |
| Photographer | Jim Koepnick |

| Camera | SIGMA fp L |
|---|---|
| Shutter Speed | 1/25s |
| Lens F Number | F11 |
| ISO | 2500 |
| Focal Length | 20mm |
| Photographer | Kim Jenssen |
Dynamism in the palm of your hand
Exceptional optical performance and superb build quality give photographers the joy of creating images
– introducing the new ultra-wide
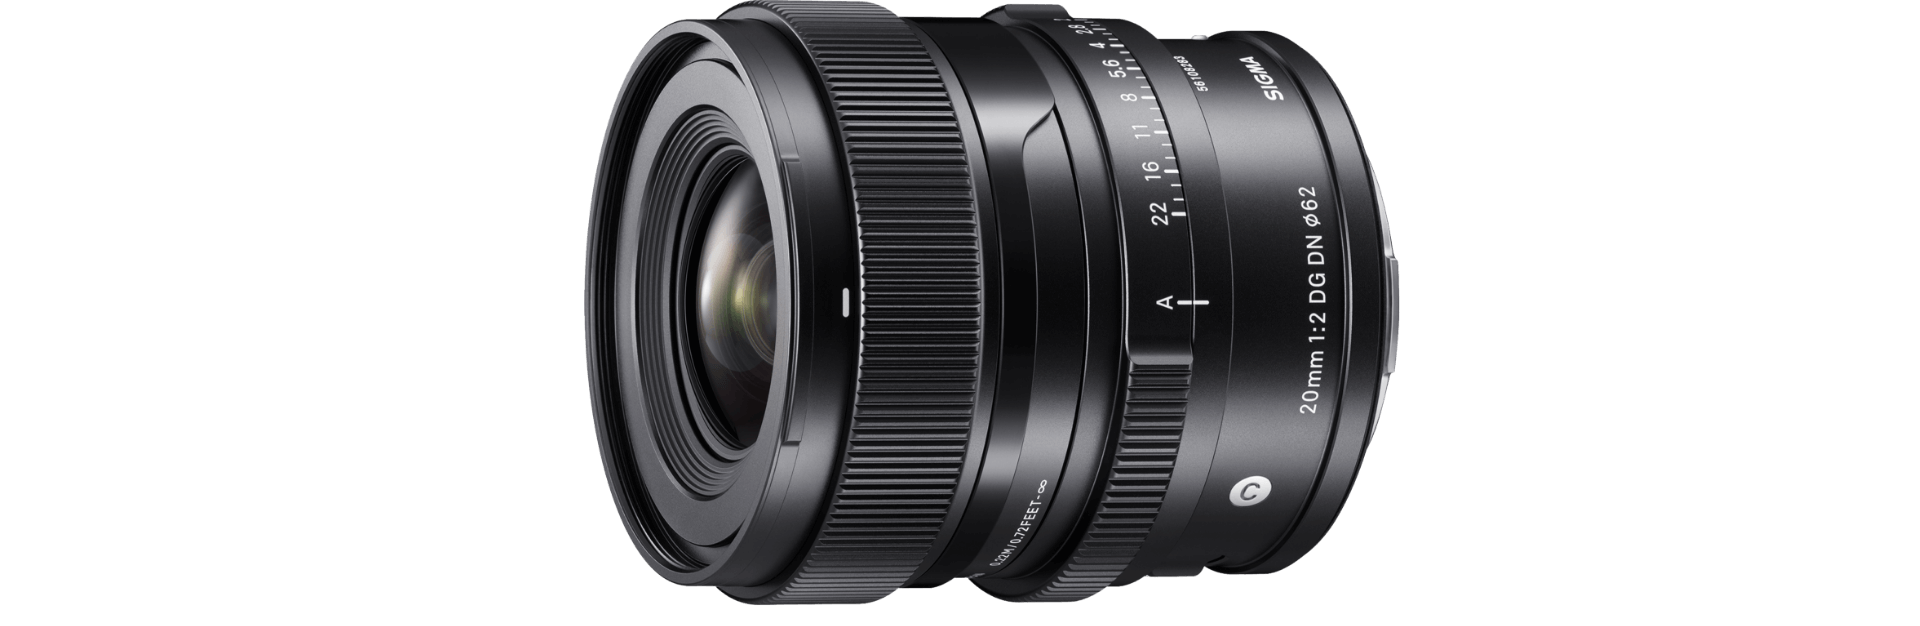
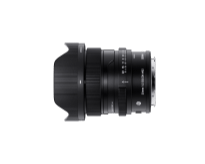
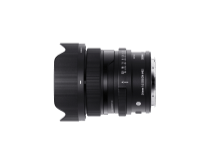
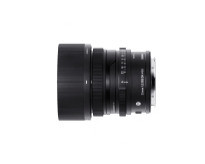
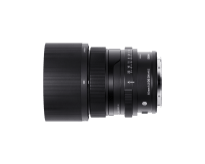
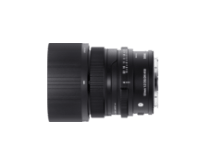
Sigma 20mm F2 DG DN | Contemporary
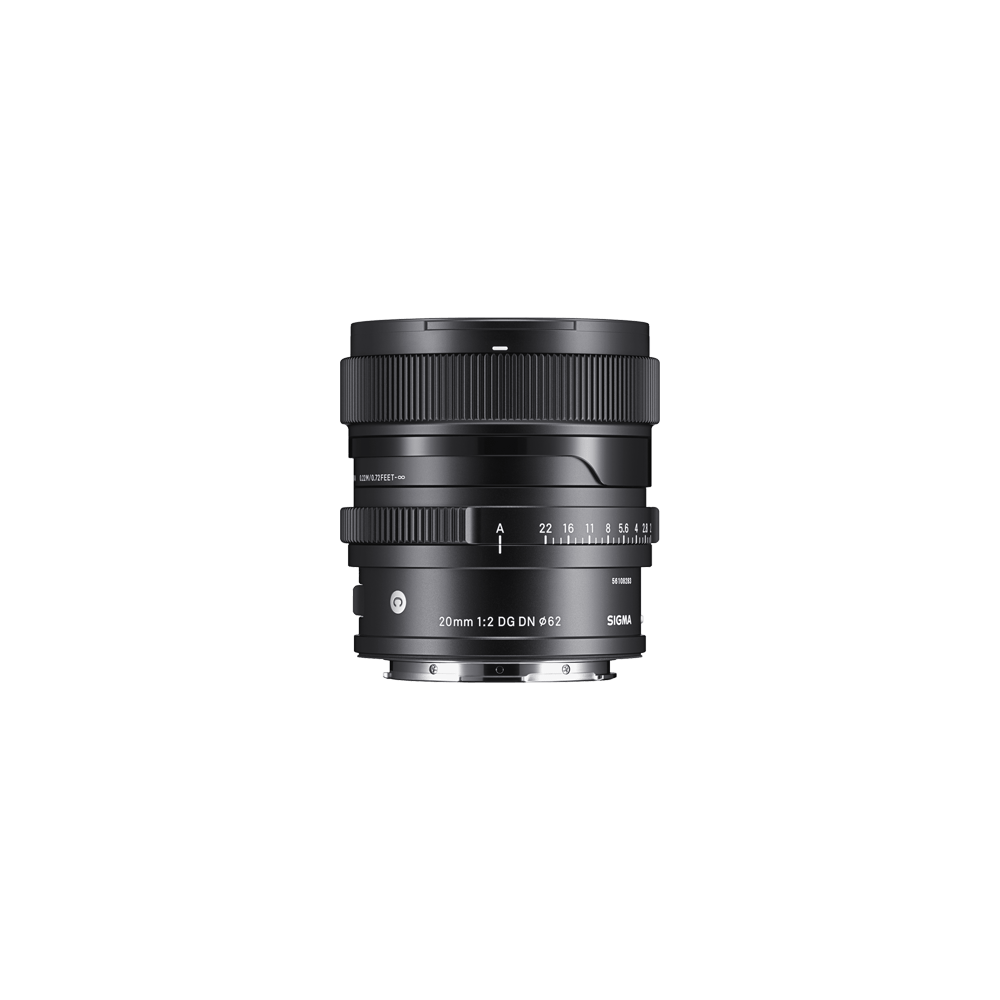
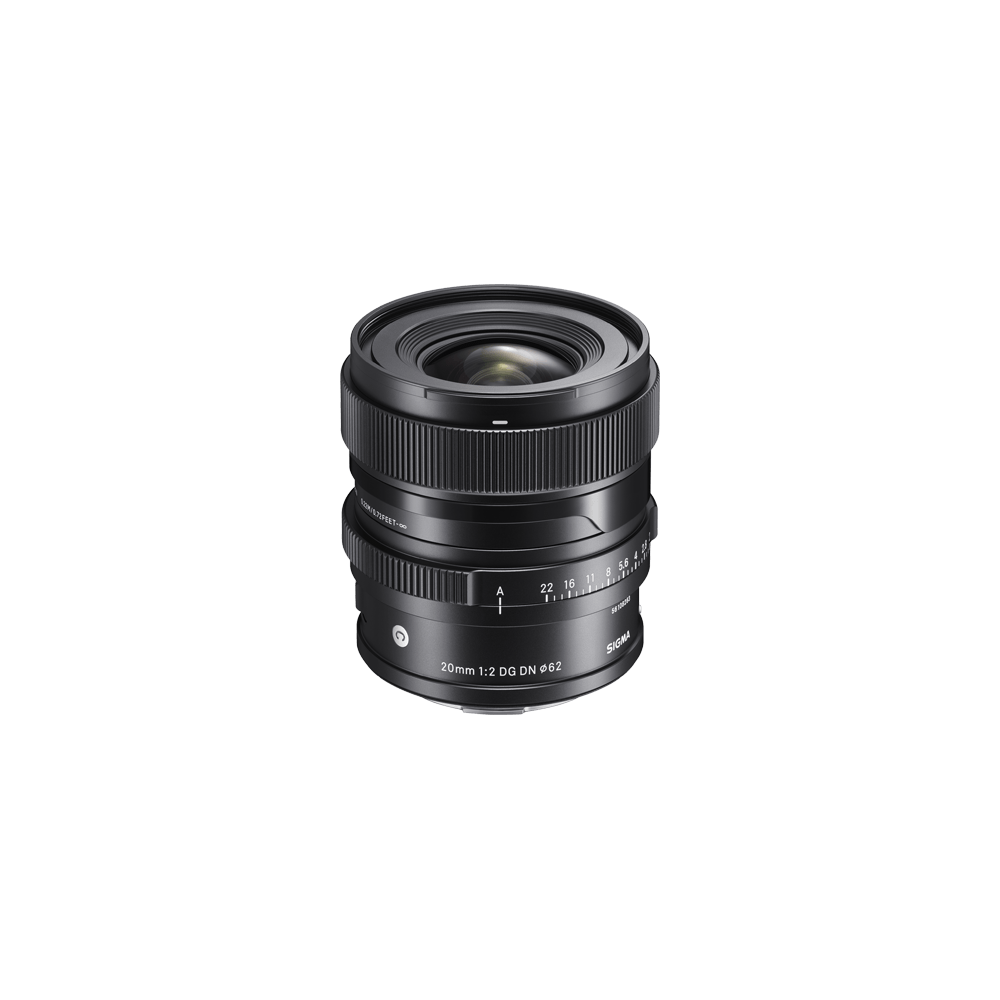
This all-new full-frame premium compact prime for mirrorless systems is the latest addition to Sigma’s I series lineup, combining a bright maximum aperture of F2, an ultra-wide 20mm focal length and stunning optical performance. The lens boasts an exceptionally small form factor, weighing in at just 370g and measuring just 72.4mm in length*, which makes it a highly practical optic that is portable enough for everyday shooting. It’s ideal for landscapes, wide-angle portraits, weddings and interiors, and is particularly well-suited to astrophotography owing to its very well-controlled sagittal coma flare. It is the fourth I series lens with an F2 aperture, joining a 24mm, 35mm and 65mm, which together make a well-matched lens set for L-Mount and Sony E-mount users.
Remarkably, the 20mm F2 DG DN | Contemporary is almost identical in size and weight to the very compact Sigma 24mm F2 I series. A sleek, all metal design, with a signature I series magnetic lens cap, a manual aperture ring and exceptional production quality means using this lens is a highly intuitive and satisfying experience, making the photo-taking process even more enjoyable. This sharp and beautifully built I series prime, the Sigma 20mm F2 DG DN | Contemporary captures the essence of the I series, bringing a new level of user experience―the pleasure of owning and using a lens.
*Figures are for L-Mount